Azure Application Gateway is a load balancing solution provided by Microsoft Azure. This web traffic load balancer works on Layer 7 of the OSI model and enables you to manage traffic for your web applications. Azure Application Gateway makes routing decisions based on URI path or host headers.
Azure Application Gateway gives you application-level routing and load balancing services that let you build a scalable and highly-available web front end in Azure.
Azure Application Gateway is a helpful tool for web traffic managers. For example, you can route traffic based on the incoming URL. If /Images or /Videos are in the URL, then you can route to the specific set of servers configured for Images or Videos. It can also be used for SSL or TLS termination as well.
Azure Application Gateway features
Before creating application gateway, let us create webservers and DNS zone
Create 3 webservers ( Virtual machines in Azure , in my scenario, i have deployed ubuntu machines)
homeserver- index.html page would be in default path var/www/html
kfcserver - index.html page would be in var/www/html/kfc
DominosServer - index.html page would be in var/www/html/dominos
I have domain name as "www.krishnafoodcourt.ml" i am going to use this domain
www.krishnafoodcourt.ml
www.krishnafoodcourt.ml/kfc
www.krishnafoodcourt.ml/dominos
As discussed earlier classes, create DNS zone and update Name servers in freenom as below.
Now update DNS zone name servers at domain name.
Step-by-step Configuration of Azure Application Gateway
Step 1: Visit the Azure portal and search for “Application gateways” and then click “Add”.
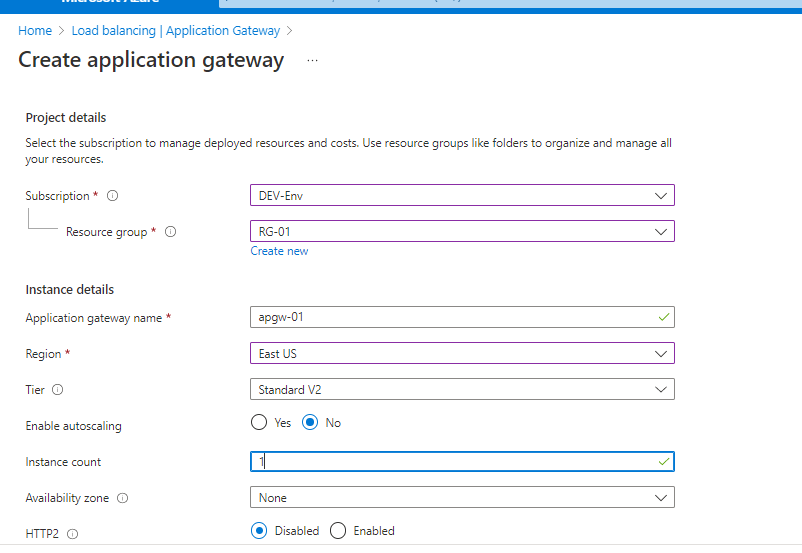
Step 2: After this, fill in all the basic details such as the resource group, autoscaling details, and virtual network. Also create a new VNet, if it does not exist before, and then click on “Frontends”
Note: for Application GW, it should have dedicated subnet as below
Step 3: After you have clicked on “Frontend” in the previous step, choose “Frontend IP address type”, create a new Public IP address, and then click on “Backends”.
Step 4: Now, select the required backend pool for the application gateway and then click on “Configuration”.
Iam going to add 3 backend pools for each server
Step 5: Under “Configuration”, add a routing rule; enter the “Rule name” and then specify the routing rules here along with the backend targets.
Step 6: For each backend target, create a specific HTTP setting; click on “Create new” under “HTTP setting”, and specify the backend protocol and port.
Step 7: To add a routing rule, specify the target type, path, and HTTP setting for that backend target. After that, click on “Save changes” and go back to routing rules.
now click on "backend targets"
ADD pathbased ruling for KFC
ADD pathbased ruling for Dominos
click on ADD and review and create
As the last step of the configuration, paste the IP address, along with the specific path-based routing, to check if the application gateway is running.


Comments
Post a Comment